Posted: March 21st, 2014 | Author: The Pirate Shore | Filed under: General | Comments Off on Tutorial: How to encrypt E-Mail with PGP
It has been a while but we’re back with some tips for protecting your privacy online. In this post we will explain how to encrypt your e-mail, so all of you can exchange e-mails securely between one another.The more people encrypt their communications the harder it will become for bodies like the NSA to monitor everything we do.
How will this work? Very simple: lets assume that at this point in time the NSA collects a couple of thousand encrypted e-mail everyday, this is a minor nuisance to them as they have to decrypt these e-mails by brute-force, which costs them quite some computing power.
Now imagine that they intercept millions and millions of encrypted emails everyday, they would be overwhelmed by the sheer amount of computing power they’d need to crack all those encrypted mails. So lets make life harder for the internet spies and massively encrypt our emails! It is a short and simple process and comparable to adding an email address to your contacts.
So lets get right to it:
Encrypting E-Mail on Mac OSX
What will I need?
After you have downloaded everything you need, we can get started. Note: For this tutorial we assume you have already set up your Mail Client with the e-mail addresses you wish to use and encrypt.We will start by launching the GPG Tools application.
The first thing you want to do is press the ‘New’ button in the top left corner of the application (you can also press ‘cmd N’ or go to ‘Key > Generate…’), to generate a new key for your email address, this will open a little window asking you to fill in your Name (this is so other people can find your public key by your name, more on this later) and your E-Mail address.
After you have filled out the form make sure you check the ‘Upload public key after generation’ box and press ‘Generate Key’.
The application will start loading (depending on your computing power, this might take a while) and after some time ask you to fill in a passphrase, this passphrase is very important since you will be using it to encrypt/decrypt messages you send/receive, so make sure you keep it safe and don’t forget it (Important: don’t share this passphrase with anyone).
Repeat this process for every email address you want to use with PGP encryption.
Congratulations, you now have generated both a Public and Secret Key to encrypt your email with. You now might wonder why you need two keys and why one of them is public, don’t we want secrecy?
Yes, we want secrecy and with this method we will achieve it. This is how the public and secret key combo works:
Lets assume we are writing an encrypted email to adam@somemail.com and Adam has already generated both a public and secret key for his email. So, when we are sending him an email, we use his public key (which we got from the public keyserver, how to do this will follow) to encrypt the email. Adam check his email and sees that we have sent him an encrypted message, he now uses his secret key to decrypt (unlock) the email we have sent him and can read it. When Adam wishes to reply to the email he then encrypts the mail with our public key and we will be able to decrypt it with our secret key.
Pretty simple right?
The question most of you will have right now is: how do I get the public key of my contacts?
This is a very easy on-time process. In the GPG application, go to ‘Key > Search For Key…’ or press ‘cmd F’ now just type in the Name or E-Mail address of the person you are looking for. A window will open with a list of relevant search results, just check the ones you want to add and press the ‘Retrieve Key’ button. This proccess can be quite time consuming depending on the amount of contacts you want to send encrypted mail to.
Now that you have collected some public keys from your contacts you can start setting up your Mail Client to work with PGP.
This step is fairly simple.
Enigmail for Mozilla Thunderbird has a pretty straight-forward setup wizard which will only take one or two minutes to complete. In case Enigmail can’t find the location of your PGP, just tell it the path to the GPG Tools application.
GPGMail for Apple Mail is part of the GPG Tools suite we have downloaded earlier, therefore this add-on does not need any additional setup. You can start sending and receiving encrypted emails immediately.
That’s it! You are now able to protect your privacy by sending encrypted E-Mail. Now help the world protect itself from mass surveillance and teach your friends & family how to encrypt their E-Mail or just refer them to this tutorial.
Encrypting E-Mail on Windows
Note: We don’t have access to a Windows computer, therefore the instructions will not be as detailed as the ones for the Mac tutorial.
What will I need?
After you have downloaded everything you need, we can get started. Note: For this tutorial we assume you have already set up your Mail Client with the e-mail addresses you wish to use and encrypt.
We will start by launching the GPG4Win application.
The first thing you want to do is generate a new key for your email address, this will open a little window asking you to fill in your Name (this is so other people can find your public key by your name, more on this later) and your E-Mail address.
The application will start loading (depending on your computing power, this might take a while) and after some time ask you to fill in a passphrase, this passphrase is very important since you will be using it to encrypt/decrypt messages you send/receive, so make sure you keep it safe and don’t forget it (Important: don’t share this passphrase with anyone).
Repeat this process for every email address you want to use with PGP encryption and don’t forget to upload your generated key to the public keyserver.
Congratulations, you now have generated both a Public and Secret Key to encrypt your email with. You now might wonder why you need two keys and why one of them is public, don’t we want secrecy?
Yes, we want secrecy and with this method we will achieve it. This is how the public and secret key combo works:
Lets assume we are writing an encrypted email to adam@somemail.com and Adam has already generated both a public and secret key for his email. So, when we are sending him an email, we use his public key (which we got from the public keyserver, how to do this will follow) to encrypt the email. Adam check his email and sees that we have sent him an encrypted message, he now uses his secret key to decrypt (unlock) the email we have sent him and can read it. When Adam wishes to reply to the email he then encrypts the mail with our public key and we will be able to decrypt it with our secret key.
Pretty simple right?
The question most of you will have right now is: how do I get the public key of my contacts?
This is a very easy on-time process. In the GPG4Win application, use the search function and type in the Name or E-Mail address of the person you are looking for. A window will open with a list of relevant search results, just check the ones you want to add and press the ‘Retrieve Key’ button. This process can be quite time consuming depending on the amount of contacts you want to send encrypted mail to.
Now that you have collected some public keys from your contacts you can start setting up your Mail Client to work with PGP.
This step is fairly simple.
Enigmail for Mozilla Thunderbird has a pretty straight-forward setup wizard which will only take one or two minutes to complete. In case Enigmail can’t find the location of your PGP, just tell it the path to the GPG4Win application.
Outlook Privacy Plugin offers a simple set-up wizard which shouldn’t cause you any problems.
That’s it! You are now able to protect your privacy by sending encrypted E-Mail. Now help the world protect itself from mass surveillance and teach your friends & family how to encrypt their E-Mail or just refer them to this tutorial.
Notes:
– Are you stuck? Or are some things not clear to you? Feel free to ask us for an additional explanation!
– If you have more detailed knowledge on how to set up PGP for Windows, please let us know what is missing in our tutorial.
– Linux tutorial coming soon!
Posted: February 21st, 2014 | Author: The Pirate Shore | Filed under: General | Comments Off on Introducing The Proxypedia
It’s been a while but we have something new for you.A tool designed to help you find all the proxies you need for your favorite torrent sites.
We ourselves have always found it annoying that there is no proper list of available proxies for sites other than The Pirate Bay. Those sites are, of course, less popular than TPB but they deserve an index of proxies too.
That’s where our new website The Proxypedia comes in. A website that lists available proxy sites of many popular torrent sites.
Do you own or use a proxy which isn’t on the list? Simply add it by submitting it through the form on the right site of the page. With the help of you, the community, we can create the biggest index of proxies on the web and help countless people circumvent censorship.
So, next time you can’t find a proxy for your favorite torrent side head to http://www.proxypedia.nl
Happy Sharing!
Posted: December 22nd, 2013 | Author: The Pirate Shore | Filed under: General | Tags: blockade, katshore, pirate shore, uk, update | Comments Off on A message to our UK users
Concerning all UK based Pirates, as you might have noticed pirateshore.org and katshore.org have been blocked by some ISP’s.
In the past few days we have been working hard to find a solution for this.
Currently we are busy with setting up pirateshore.nl to enable you full access to The Pirate Shore again.
In the meantime you can access the Pirate Bay with out other proxy www.bayproxy.nl and the katshore should be still available via our IP-address (5.157.80.91).
Just type that number into your browser and hit enter.
We will keep you updated on our progress and we wish you all happy sharing and a Merry Xmas!
Update: pirateshore.nl is now online an accessible to Uk users and the rest of the world. Happy New Year!
Posted: November 13th, 2013 | Author: The Pirate Shore | Filed under: General | Comments Off on The Proxy Shore – Settings Explained
As promised here is a more detail description of the available settings from The Proxy Shore. This will soon also be available to see on the site itself.
– Include mini URL-form on every page
This option lets you decide whether or not you want to see a URL and option bar on top of the page your browsing to.
Enabling this option lets you change other settings and surf to other pages during your session.
Disabling this option will just show you the entire page you’re browsing as if you weren’t using a proxy.
– Remove client-side scripting (i.e JavaScript)
Enabling this option will make your browsing session much safer as malware is primarily spread through JavaScript across the web but it will also remove the functionality of some sites (some more than others). For example, the Facebook newsfeed is based on JavaScript, so when you enable this option Facebook will not work properly for you.
We recommend, during a browsing session to trusted websites, disable this option. When visiting websites whose sources you don’t know if you can trust, be safe and enable this option.
You can always en- or disable this option in the top bar.
– Allow cookies to be stored
Cookies are little files that help you load websites quicker, remember your logins and settings. But also are used by advertisers and websites like Google, Facebook and Twitter to track your actions across the web (which search results you click, to which websites you go, which sites you came from).
We recommend not to use cookies except if absolutely necessary for the functionality of a site.
– Show images on browsed pages
This is pretty straight-forward, this option lets you choose whether or not to load images on the sites you visits.
Not loading images has the benefit of sites loading faster so when you are on a slow connection and you’re heading to a mainly text-based website it is handy to disable this option.
– Show actual referring Website
This option simply means whether or not you want to tell other websites, which site you’ve just been on. And to be honest, why would you tell them?
– Use ROT13 encoding on the address
ROT13 is a simple encoding method often used to hide spoilers or sensitive material no everybody might want to read. The encoding method is pretty simply done by rotating letters of the alphabet.
The method might be fairly easily decoded it but does mean somebody has to take the time to decode the web addresses you are visiting. Or simply: nobody can tell by first glance of the url which site you are on.
– Use base64 encoding on the address
These encodings are commonly used to encode binary to text and transfer or store this data like with email or websites.
We recommend this option to be enabled for a more smooth experience of the web.
– Strip meta information tags from pages
This option pretty much explains itself. It gives you the choice of removing meta-data tags from pages you visit. Meta-data includes ip addresses, locations, date and time, browser version, operating system and more.
We recommend enabling this option for a more anonymous experience.
– Strip page title
This option lets you whether or not you want to remove the page titles of websites you visit. For example, if you visit youtube.com with this option enabled, the tab in your browser will display the current URL. With this option disabled it would say ‘YouTube’.
This setting has no anonymity or security features, it is just a matter of preference.
– Store cookies for this session only
With this option enabled, all the cookies you receive during your browsing session (given you have cookies enabled) will be deleted after you leave The Proxy Shore. When disabled, your cookies will be stored in your browser until you delete them manually or a scheduled delete takes place (depending on your browser settings).
Posted: October 27th, 2013 | Author: The Pirate Shore | Filed under: General | 2 Comments »
In an effort to streamline our services’ names and adding the possibility for further innovations we have decided to rename the Pirate Shore Proxy to The Proxy Shore.
It will still have all the features you are used to and the only actual difference is the new name and the fact that now you can access it via: http://proxyshore.org or if you want an encrypted connection (which we recommend) https://proxyshore.org
When connecting through SSL you will get a security risk message, telling you our certificate isn’t trusted.
This is because we’re paying for these services out of our own pockets and therefore can’t afford an official certificate at this moment in time. We hope in the future to be able to change this.
Alternatively, http://pirateshore.org/proxy will now automatically redirect you to proxyshore.org
We wish you happy anonymous surfing and much fun enjoying an uncensored internet!
Note: You can also access The Proxy Shore through www.proxyshore.tk
Posted: October 11th, 2013 | Author: The Pirate Shore | Filed under: Privacy | Tags: Global, Guide, prism, Privacy, Surveilalnce, Tempora, xkeyscore | 2 Comments »
Ever since spring-time this year we all know that we are all part of a global surveillance program, so sophisticated and deep-running that its almost unbelievable. I’m talking of course about PRISM (incl. XKeyscore and Tempora). All the information we put out on the internet is being intercepted by the forces behind these surveillance programs, I wish I could say that only one force is behind this all but unfortunately it is a collaborative effort between numerous international entities, such as the American NSA, German BKA and British MI6. With this Anti-Surveillance Guide we are trying to do our part in protecting global privacy.
What exactly do these surveillance programs do?
For starters, they collect all the information you willingly put up on the internet (think Blog Posts, Tweets, Facebook updates, picture uploads etc) and besides that they collect infinite amounts of Meta-data on individuals.
Meta-data is the data that describes your online actions e.g. you write an email to a friend, the meta-data of this email are things like your IP address, the location data of your IP, the time the email was sent, the mail client you’re running etc.
This meta-data is collected from your phone calls, voip calls (think skype, viber), e-mails, browsing history, online banking, instant messages (MSN, Whatsapp, iMessage etc).
Getting access to your computer and file-structures is also on the action plan of these surveillance programs.
Why should I care about all my information being collected?
Before you start thinking “But I’m not a threat, I haven’t done anything wrong.” Imagine it is 1930 and the internet and social media already existed. Poeple put their religious and political views on the web, thinking no harm can come of it. Three years later Hitler comes into power in Germany and has access to an immense database of his people, he immediately knows who is Jewish, who has political views that oppose the Nazi-party, who is likely to disobey etc.
We don’t know what the future will hold and therefore we have human rights laws that are supposed to protect our rights (including the right to privacy) no matter what the future brings.
Therefore it is important to protect your privacy and try not to feed the immense database any more.
How do I prevent being part of this global surveillance?
– Start by being very careful with what you put up on the internet. Always remember “Once on the web, on the web forever”.
– Stop using services provided by the internet giants (Facebook, Google, Apple, Microsoft, Yahoo) whenever you use any of these services you can be quite sure that all your activity will be visible by the forces behind the surveillance programs.
– Encrypt your communications (your messages, your calls, your emails, everything)
– Support Open-Source applications and services (open-source means that the source code of the app/service are open to see and use for everyone, this way people can have a look ‘behind the scenes’ and find out whether the app does what it claims it does, unlike proprietary software)
– Consider switching your computers operating system to Linux-based systems (as MAC OSX and Windows are provided by Apple and Microsoft, whom can’t be trusted to keep our information safe)
– Don’t fall for the cloud computing scam, Clouds are giant server centers that store all data and info in one place (perfect for NSA, MI6 etc) and are actually nothing new, its just Online Storage with a fancy name and the ability to sync faster than used to be. Try to host your own cloud if you own a server, or find a service that you are absolutely sure you can trust.
– Don’t trust browsers provided by the internet giants, Safari (Apple), Chrome (Google), Internet Explorer (Microsoft)
Where can I find alternatives?
A very good source of alternative browsing and communication options is https://www.prism-break.org
The amount of options can be quite overwhelming at first but just take your time and do your research step by step.
What are The Pirate Shore’s favorites?
Amongst our favorites are:
Browsers: Tor Bundle, Firefox
Browser-plugins: HTTPS Everywhere, HTTPS Finder, NoScript, DNTMe, AnonymoX
IM & VOIP: Linphone, Retroshare, Pidgin, Jitsi, Cryptocat, BitTorrent Chat (in development), Hemlis (in development)
Mail Client: Mozilla Thunderbird, Icedove
Mail Encryption: PGP
Online Storage (Cloud): ownCloud, BitTorrent Sync
Online payment: Bitcoin
File Encryption: TrueCrypt
Search Engine: Startpage.com (Google enhanced), Ixquick.com (results from over 5 different engines)
We haven’t had the chance to test every alternative yet but bare with us as we test more.
Soon we will be posting more detailed explanations of our favorite picks, in the meantime do your own research;)
Tell us about your favorite alternative software in the comments!
Posted: September 25th, 2013 | Author: The Pirate Shore | Filed under: General | Tags: Anonymous surfing, Free internet, Pirate Shore Proxy, Unblock the web | Comments Off on Introducing Pirate Shore Proxy
We’re happy to announce an exciting new feature to our site, from now own you can unblock any website you want to or just visit sites anonymously with the Pirate Shore Proxy.
How does it work?
Instead of visiting a website directly through your ISP (Internet Service Provider) and being subject to blockades and tracking, you will be telling our server to visit the website for you and display it on your screen. It will protect you from tracking as it is our server who visits the website not you and it will circumvent any blockades imposed by your ISP’s.
How will I get there?
There’s two ways to visit the Pirate Shore Proxy.
1. Directly
2. Through the Navigation Bar
– If you want to visit Pirate Shore Proxy directly, type http://www.pirateshore.org/proxy into your browser.
– We have updated the Pirate Shore homepage with a new navigation bar. It is fairly straight-forward but we’ll explain here in any case.
If you visit pirateshore.org you will notice two new buttons on the left side.
The top one, with the ‘P’ logo, will direct you to the Proxy.
The second button, with the bird logo, will bring you to our Twitter page where we will be taking feedback and suggestions as well as keeping you up to date with our site-status and new features.
Soon we’ll post a detailed explanation of the advanced options for the Proxy.
Posted: August 17th, 2013 | Author: The Pirate Shore | Filed under: Privacy | Tags: Ad, Guide, iOS 7, iPad, iPhone, Locations, prism, Privacy, Siri, surveilance, Tempora, tracking, xkeyscore | 1 Comment »
Momentarily, this post only concerns the beta testers of the new OS but soon enough iOS 7 will be unleashed unto the world and most likely break any adaption record that has been set in the past.
With this in mind we at the Pirate Shore decided to guide you through some important settings in the new OS in order to protect your privacy.
We’ll guide you through three steps you have to take in order to protect your privacy.
1. Frequent Locations
2. Ad-Tracking
3. Siri
So, lets start with Frequent Locations, a new setting in iOS 7, which makes your iDevice collect all your location data and display it on a detailed map (including the time you arrived, left and how often you visited that place).
How do you avoid this? Well, luckily the folks at Apple did give you the option to switch off this scary setting.
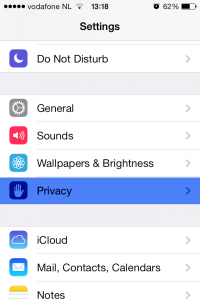
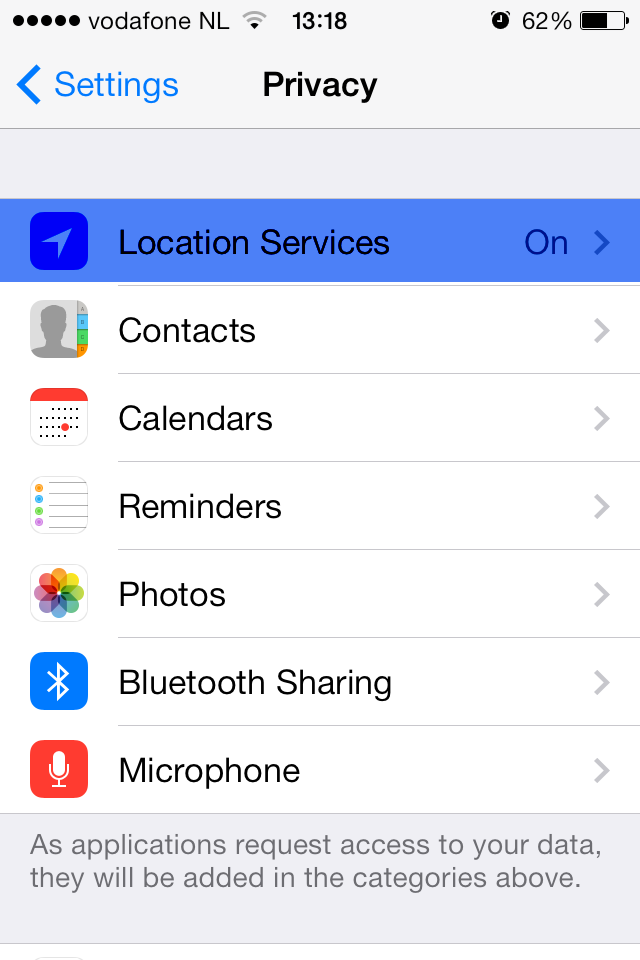
First, open the Setting app in your Springboard (your homescreen), then navigate to Privacy.
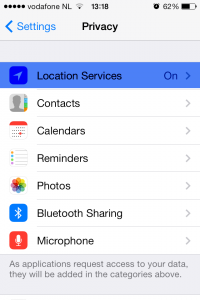
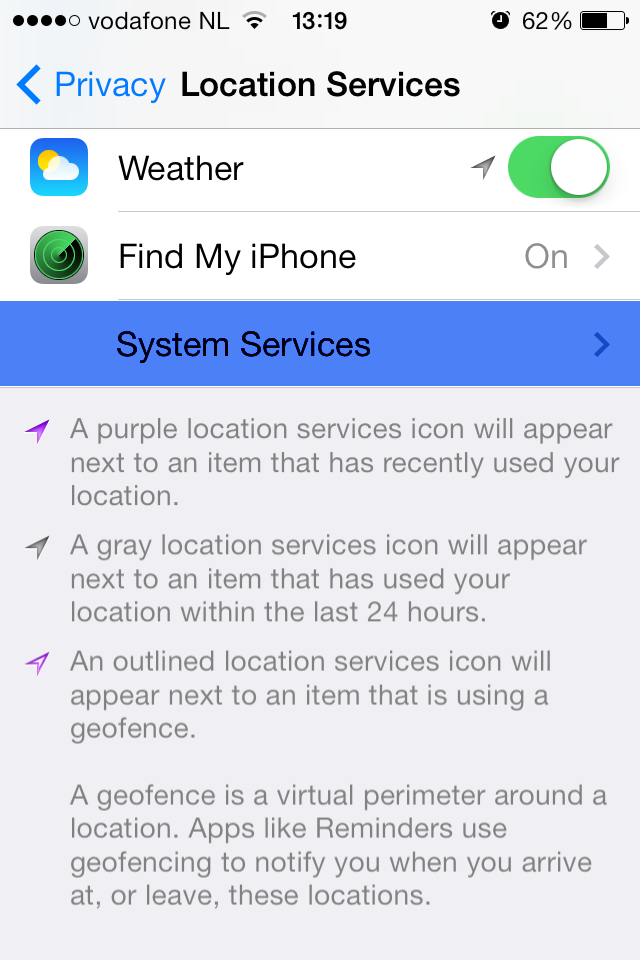
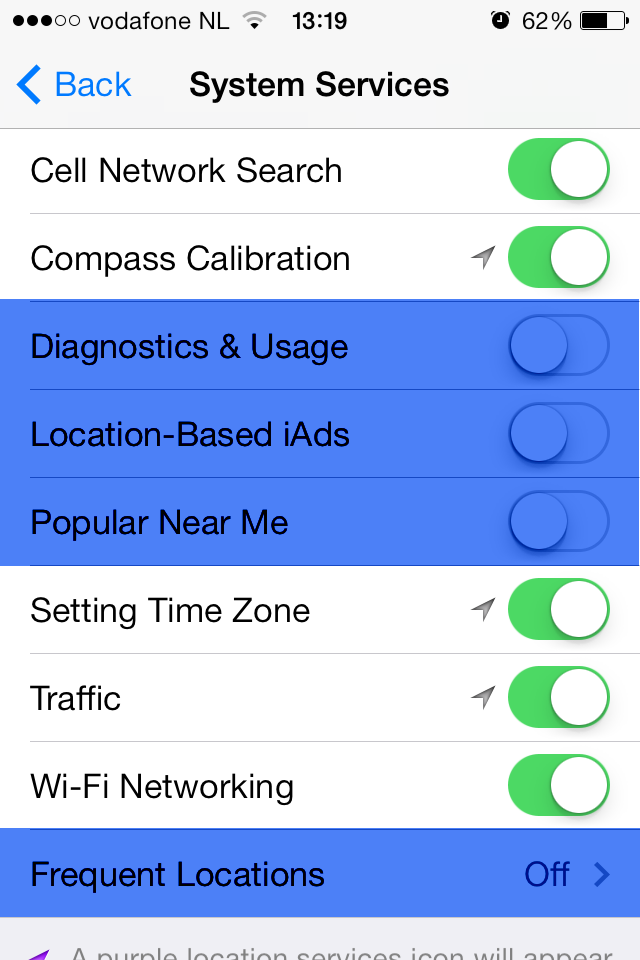
Now Select the Location Services, where you’ll find all the apps which have permission to use your Location, try to give as few as possible access to your location. If you scroll all the way down you will find a section called System Services, click it.

Here you find all the OS services which use your location, some necessary, others not so much.
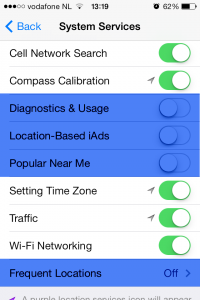
At this point I advise you to turn off the location access to Diagnostics & Usage as this information will be send to Apple and lets be honest we don’t want a multi billion dollar company to know where we are and how we use our phone (as I recall Apple claims that the diagnostic data will be anonymized before being sent to Apple, so turning this off is optional.)
The next to turn off is Location-Based iAds, the name is self explanatory and unless you enjoy specially targeted ads on your phone, I’d turn this off.
Popular Near Me is a new App Store feature in iOS 7, it shows you which apps are popular with people in your surroundings (I do not know the exact radius but I estimate 5km). To me this is a very unnecessary feature which will only give away my location to another party therefore I turned it off.
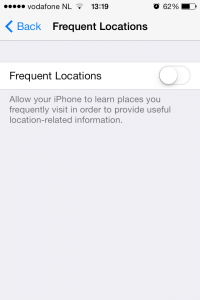
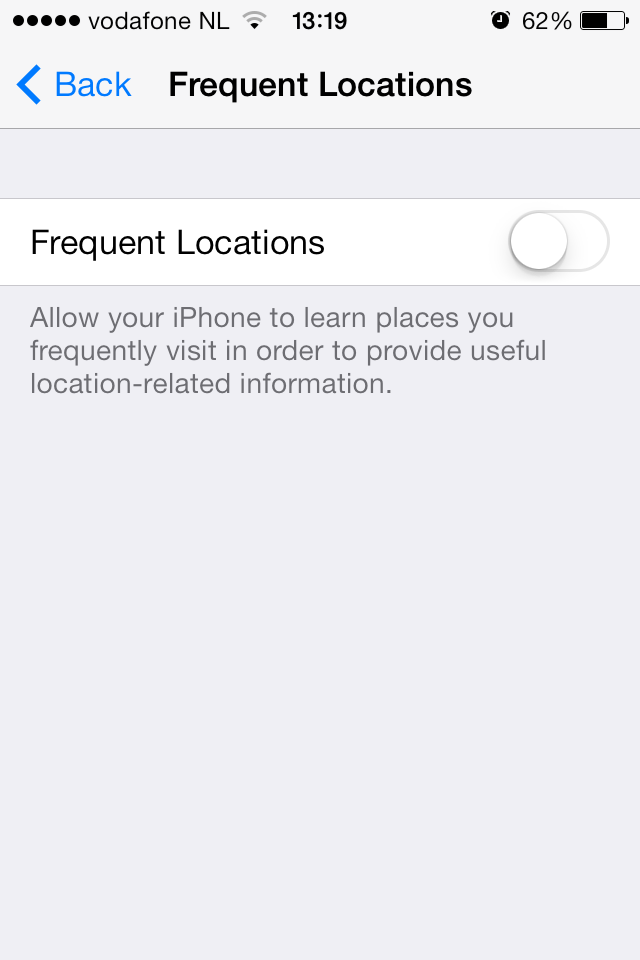
As you can see on the picture above Frequent Locations is turned Off on my iPhone, but it is On standard after installing iOS 7.
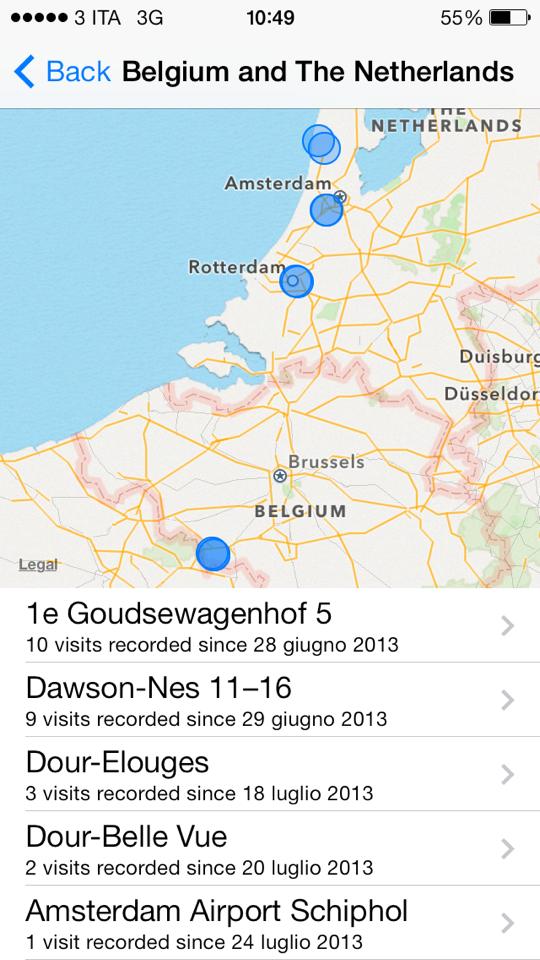
This is the screen with Frequent Locations turned off, but if turned on, you will see an option to Improve Maps and one where you can look at your personal map showing when and how often you’ve visited different places, with scaring accuracy as you can see below.

I understand that Apple explains this feature as a way to improve their Maps app and increase your convenience for more accurate location services but to me this is a very dangerous feature. At the risk of sounding paranoid, lets say someone wants to find you and hurt you, as soon as they get a hold of your Frequent Locations map they’ll know exactly where you like to go and at which times. Besides after all the recent PRISM, XKeyscore and Tempora revelations it doesn’t sound crazy to me that governments all over the world will be happy to collect these Maps.
After we have disable one privacy invading feature it is time for number 2 Ad-Tacking.
We all hate ads and ad companies for bombarding us with them, so why let them track us? Doesn’t make sense, so lets get rid of that.
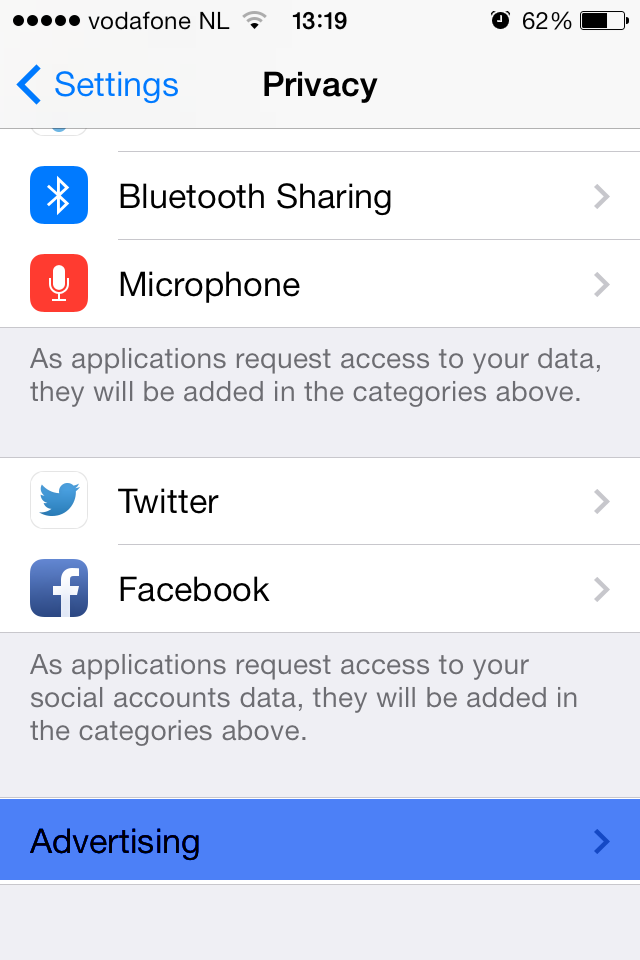
Go back to your Settings app and return to the Privacy section.
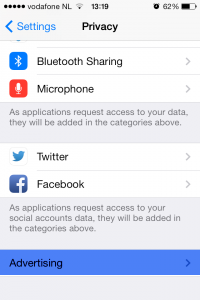
Scroll all the way to the bottom and you will find a section called Advertising.
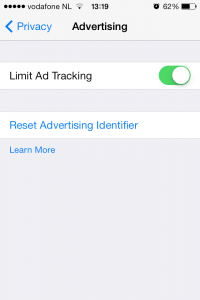
Make sure you enable the Limit Ad-Tracking option. This will tell the iAd service to not track you and not send you specifically targeted apps base don your location and online behavior. At this moment not every app uses the iAd service, some still use other methods of advertising in which case you might still be tracked. Apple claims they will force all developers to switch to the iAd service eventually but until then you’re not 100% safe from Ad-Tracking.
Click the Learn More button to read up on what Apple has to say.
Thats two down and one to go. The last one is Siri, for some the most important feature of an iPhone/iPad but for me almost the perfect Spyware.
I’ve been using Siri for over a year before actually reading the Privacy Agreement posted by Apple and once I’ve done that Siri has been immediately disabled and not turned on ever since. It was an easy decision for me since I’ve never properly used Siri except for the occasional laugh with friends. I understand some of you use it everyday and love it, but consider the privacy you’re trading in.
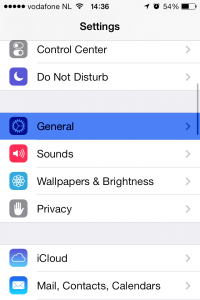
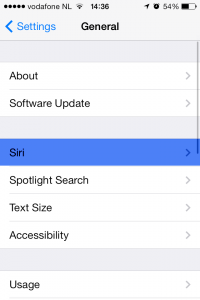
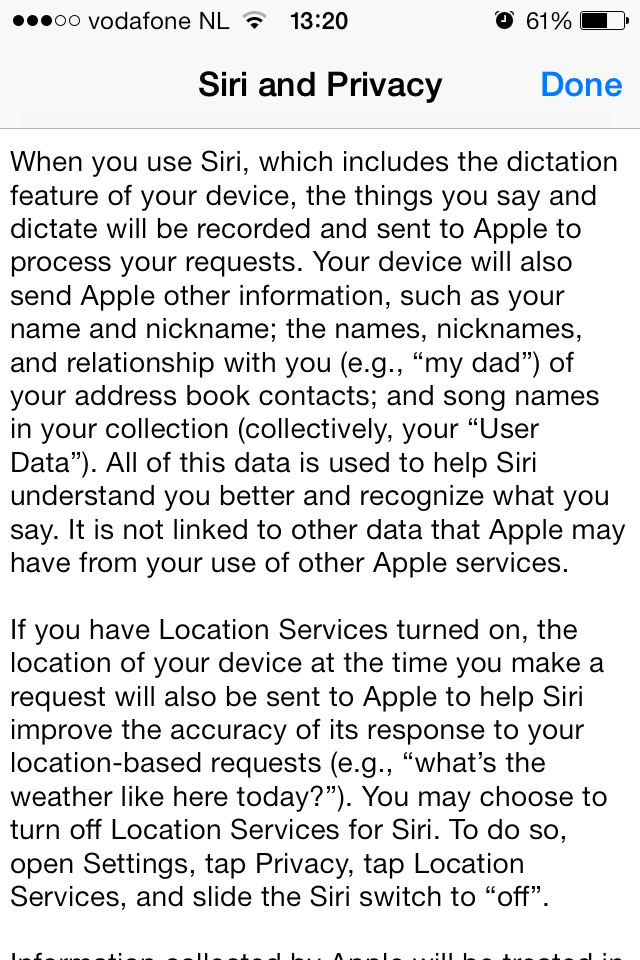
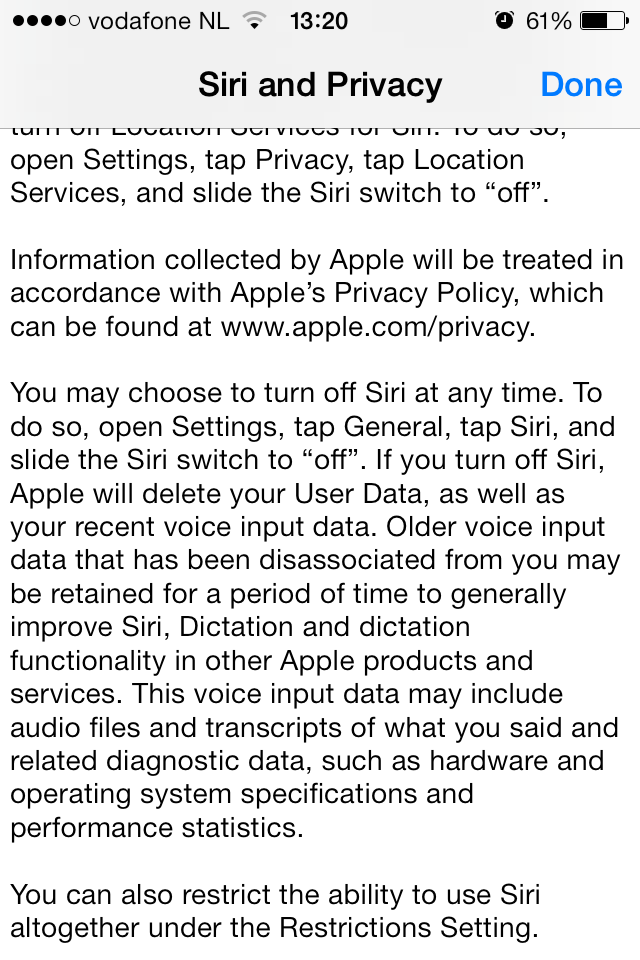
You’ll find the option to turn off Siri in your Settings app under General and then Siri as shown above. You’ll also find the Privacy Agreement from Apple regarding the use of Siri.
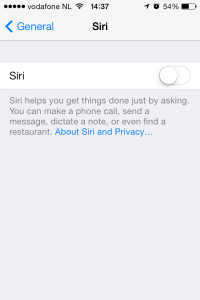
Just click the blue text About Siri and Privacy… and a long agreement will be shown.
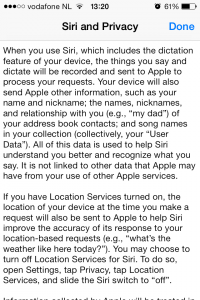

Once you’ve read it you’ll see that every time you use Siri, Apple will save a recording of your voice, your location, your name, nickname, and relationships with contacts such as family, partner etc and even data about your music library on their servers.
They claim that this data will not be associated with any other data they might have on you, which sounds reassuring but the fact remains that your trading in a whole lot of data for the simple convenience of not having to type.
There you go! Your iOS 7 device has now become less of a Privacy invasion and you can focus and the fun new features of this OS.
We realize that this guide might not be complete, in case we have missed something, please contribute to this guide by telling us about it in the comments!


Recent Comments